Self-Hosting Journey - Part 7 - Securing Data with Automated Backup Plan

Hello and welcome back! In our last post, we successfully built the heart of our homelab: a resilient ZFS NAS that serves files across our network. Our data now has a safe place to live, but a vault is only as good as its security and contingency plans. Now, we’re going to make that data invincible.

This post is all about automation and protection. We will build a multi-layered, automated defense system to guard against everything from accidental file deletion to a full-blown disaster. We’ll be following the classic 3-2-1 backup rule: at least 3 copies of our data, on 2 different media types, with 1 copy located offsite.

Before we build our defenses, let’s quickly recap the structure of our data vault, which we organized into several ZFS datasets, each with a specific purpose:

ZFS Dataset Content Sharing Method
/ssd/archive Nextcloud, Immich, & Jellyfin data NFS
/ssd/backup Proxmox VZDump Backups N/A
/ssd/cloud Small sensitive data for cloud sync rclone
/ssd/docker Docker-compose & config backups rsync
/ssd/share Temporary shared files Samba (SMB)
/ssd/sync Synced notes, password DB, etc. Syncthing

ZFS Dataset Organization

Let’s dive in and automate our defenses.

The Watchful Guardian: Automated Monitoring and Notifications

Before we build our alarms, we need a way to hear them. An automated process is useless if you don’t know whether it succeeded or failed. For this, I set up a Telegram bot to send instant notifications to my phone.

Setting up the bot is simple using Telegram’s BotFather, this is the procedure.

  1. Open Telegram and search for BotFather.
Telegram BotFather
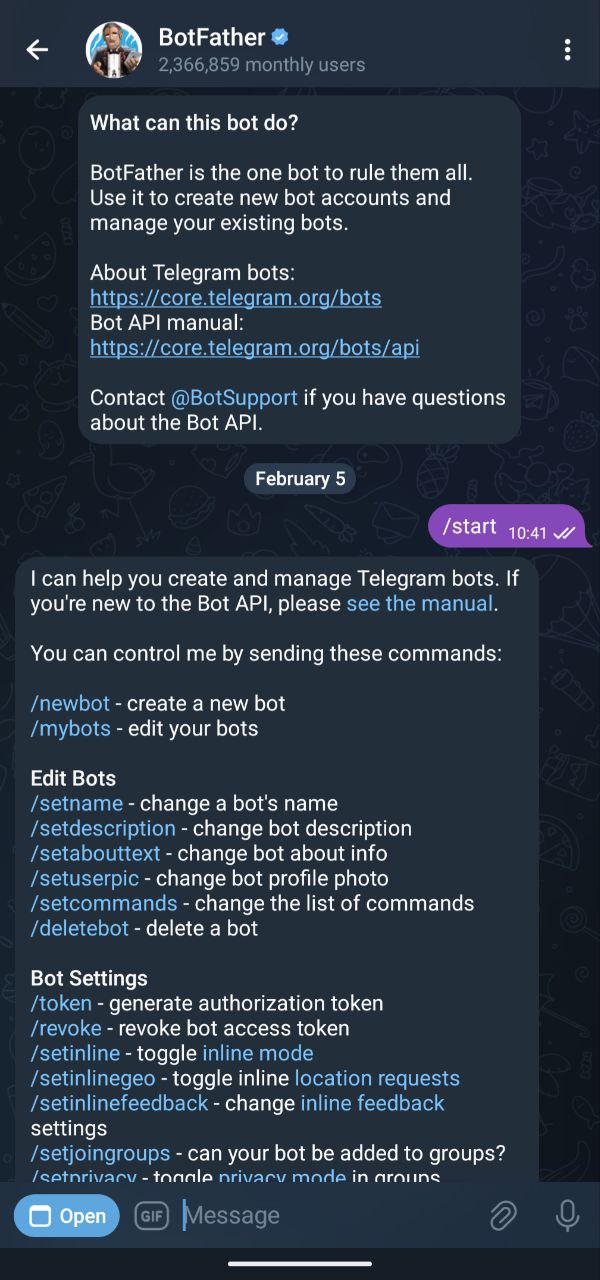
  1. Start a chat with BotFather and send the following command:
1
/start
  1. Create a new bot by sending:
1
/newbot
  1. Follow the prompts to:

    • Choose a name (e.g., Home)

    • Choose a unique username (e.g., home_bot)

  2. BotFather will reply with a link to your new bot and a bot token.

    • Open the link from your phone to start a chat with your bot.

    • Press Start and send any message to initialize the conversation.

  3. From your PC, retrieve your chat ID by making a getUpdates API request using your token:

1
curl -s "https://api.telegram.org/bot<token>/getUpdates"
  1. In the response, locate the chat.id field. This is your chat_id.

  2. Test sending a message using the sendMessage API:

1
curl "https://api.telegram.org/bot<token>/sendMessage?chat_id=<chat_id>&text=Hello"

The Telegram bot is now set up and ready to be used in scripts for sending notifications.

Defense Layer 1: Data Integrity and Local Snapshots

Our first line of defense protects the data living on the NAS itself. This involves two automated scripts that run on the Proxmox host.

  1. Daily Health Check:

This script runs every morning to check the status of the ZFS pool. If it ever detects a “DEGRADED” state (e.g., due to a drive failure), it immediately sends a high-priority alert to my Telegram bot, letting me know that a disk needs attention and maybe needs to be replaced.

1
2
3
4
5
6
7
8
9
10
11
12
13
14
15
16
17
18
19
20
21
22
23
24
25
26
#!/bin/bash

# Telegram data for notifications
TELEGRAM_TOKEN=<TELEGRAM_TOKEN>
TELEGRAM_CHAT_ID=<TELEGRAM_CHAT_ID>

# Function to send an email alert on error
send_notification() {
local message="$1"
local url="https://api.telegram.org/bot$TELEGRAM_TOKEN/sendmessage?chat_id=$TELEGRAM_CHAT_ID"
curl -G --data-urlencode "text=$message" "$url"
}

output=$(/usr/sbin/zpool status ssd)

# Run the zpool status command and check if 'DEGRADED' is found
if echo $output | grep -iq 'DEGRADED'; then
# If 'DEGRADED' is found, send a GET request using curl
echo "$(date '+%Y-%m-%d %H:%M:%S') $(hostname) - [ERROR] - A ZFS disk is degraded, replace it as soon as possible!"
send_notification "$(date '+%Y-%m-%d %H:%M:%S') $(hostname) - [ERROR] - A ZFS disk is degraded, replace it as soon as possible!"
else
echo "---------------------------------------------------------------------------"
echo "$(date '+%Y-%m-%d %H:%M:%S') $(hostname) - [INFO] - Status check completed!"
echo "$output"
echo "---------------------------------------------------------------------------"
fi
  1. Automated ZFS Snapshots:

ZFS snapshots are instantaneous, read-only copies of a dataset. They are the perfect defense against ransomware or accidental file deletion. I wrote a comprehensive bash script that runs every night via cron to manage them.

Key Features of the Snapshot Script:

  • Creates Snapshots: It automatically creates daily, weekly, monthly, and yearly ZFS snapshots of my critical datasets (archive, docker, share, etc.).

  • Enforces Retention: It automatically purges old snapshots based on a defined policy (e.g., keep 7 daily, 4 weekly) to save space, cleverly ensuring it never deletes the last snapshot that was sent offsite.

  • Reports Status: After every run, it sends a summary to my Telegram bot, confirming that the snapshots were created successfully or alerting me if an error occurred.

1
2
3
4
5
6
7
8
9
10
11
12
13
14
15
16
17
18
19
20
21
22
23
24
25
26
27
28
29
30
31
32
33
34
35
36
37
38
39
40
41
42
43
44
45
46
47
48
49
50
51
52
53
54
55
56
57
58
59
60
61
62
63
64
65
66
67
68
69
70
71
72
73
74
75
76
77
78
79
80
81
82
83
84
85
86
87
88
89
90
91
92
93
94
95
96
97
98
99
100
101
102
103
104
105
106
107
108
109
110
111
112
113
114
115
116
117
118
119
120
121
122
123
124
125
126
127
128
129
130
131
132
133
134
#!/bin/bash

# Get current day of the week, month, and day of the month
DAY_OF_WEEK=$(date +%u) # 1-7 (1 is Monday, 7 is Sunday)
DAY_OF_MONTH=$(date +%d) # 01-31
MONTH=$(date +%m) # 01-12
NOW=$(date +%s)

# Define the dataset (you can pass this as an argument)
BASE_DATASET="pool"
DATASETS="dataset1 dataset2 dataset3"

SNAPSHOT_FILE="/opt/backup/log/last_snapshot.txt" # File to store the last sent snapshot

# Retention policy limits
DAILY_RETENTION=7
WEEKLY_RETENTION=4
MONTHLY_RETENTION=12
YEARLY_RETENTION=2

set -e # Exit the script if any command fails

# Telegram data for notifications
TELEGRAM_TOKEN=<TELEGRAM_TOKEN>
TELEGRAM_CHAT_ID=<TELEGRAM_CHAT_ID>

# Function to send a telegram alert on error
send_notification() {
local message="$1"
local url="https://api.telegram.org/bot$TELEGRAM_TOKEN/sendmessage?chat_id=$TELEGRAM_CHAT_ID"
curl -G --data-urlencode "text=$message" "$url"
}


# Function to get the last snapshot sent remotely for a specific dataset
get_last_snapshot_remote() {
local dataset="$1"
local last_snapshot_remote=""
if [ -f "$SNAPSHOT_FILE" ]; then
last_snapshot_remote=$(grep "$dataset" "$SNAPSHOT_FILE" | awk '{print $2}')
fi
echo $last_snapshot_remote
}

delete_old_snapshots() {
dataset=$1 # The dataset (e.g., ssd/archive)
snapshot_type=$2 # Snapshot type (daily, weekly, monthly, yearly)
retention_limit=$3 # Retention limit for snapshots

# List snapshots of the specific type (daily, weekly, monthly, yearly) and sort by creation time (oldest first)
snapshots=$(zfs list -H -t snapshot -o name -S creation "$dataset" | grep "$snapshot_type" | sort)

# Count the number of snapshots of the specific type
snapshot_count=$(echo "$snapshots" | wc -l)

last_snapshot_remote=$(get_last_snapshot_remote "$dataset")

echo "$(date '+%Y-%m-%d %H:%M:%S') $(hostname) - [INFO] - Last snapshot remote is $last_snapshot_remote"

# If we have more snapshots than the retention limit, delete the oldest ones
if [ "$snapshot_count" -gt "$retention_limit" ]; then
excess_count=$((snapshot_count - retention_limit))
snapshots_to_delete=$(echo "$snapshots" | head -n "$excess_count")
for snapshot in $snapshots_to_delete; do
if [ "$snapshot" != "$last_snapshot_remote" ]; then
echo "$(date '+%Y-%m-%d %H:%M:%S') $(hostname) - [INFO] - Deleting snapshot: $snapshot"
zfs destroy "$snapshot"
else
echo "$(date '+%Y-%m-%d %H:%M:%S') $(hostname) - [INFO] - Snapshot $snapshot was not deleted because it is not the latest snapshot on the offsite backup machine."
fi
done
else
echo "$(date '+%Y-%m-%d %H:%M:%S') $(hostname) - [INFO] - No snapshots need to be deleted."
fi
}

create_snapshot() {
local dataset="$1"
local dataset_name="$2"
local snapshot_type="$3"
local snapshot_name="$3-$(date +\%Y-\%m-\%d)"

# Attempt to create the snapshot
if /usr/sbin/zfs snapshot "$dataset/$dataset_name@$snapshot_name"; then
echo "$(date '+%Y-%m-%d %H:%M:%S') $(hostname) - [INFO] - Snapshot $dataset/$dataset_name@$snapshot_name created successfully."
else
echo "$(date '+%Y-%m-%d %H:%M:%S') $(hostname) - [ERROR] - Failed to create snapshot $dataset/$dataset_name@$snapshot_name."
send_notification "$(date '+%Y-%m-%d %H:%M:%S') $(hostname) - [ERROR] - Failed to create snapshot $dataset/$dataset_name@$snapshot_name."
exit 1
fi
}

# Monthly trim and scrub (only on the 1st day of the month)
if [ "$DAY_OF_MONTH" -eq 1 ]; then
/usr/sbin/zpool scrub $BASE_DATASET && echo "$(date '+%Y-%m-%d %H:%M:%S') $(hostname) - [INFO] - Scrub started successfully for $BASE_DATASET" || echo "$(date '+%Y-%m-%d %H:%M:%S') $(hostname) - [ERROR] - Failed to start scrub for $BASE_DATASET"
/usr/sbin/zpool trim $BASE_DATASET && echo "$(date '+%Y-%m-%d %H:%M:%S') $(hostname) - [INFO] - Trim started successfully for $BASE_DATASET" || echo "$(date '+%Y-%m-%d %H:%M:%S') $(hostname) - [ERROR] - Failed to start trim for $BASE_DATASET"
fi

# Daily snapshots (always runs)
for dataset in $DATASETS; do
create_snapshot "$BASE_DATASET" "$dataset" "daily"
done

# Weekly snapshots (only on Sunday)
if [ "$DAY_OF_WEEK" -eq 7 ]; then
for dataset in $DATASETS; do
create_snapshot "$BASE_DATASET" "$dataset" "weekly"
done
fi

# Monthly snapshots (only on the 1st day of the month)
if [ "$DAY_OF_MONTH" -eq 1 ]; then
for dataset in $DATASETS; do
create_snapshot "$BASE_DATASET" "$dataset" "monthly"
done
fi

# Yearly snapshots (only on January 1st)
if [ "$MONTH" -eq 1 ] && [ "$DAY_OF_MONTH" -eq 1 ]; then
for dataset in $DATASETS; do
create_snapshot "$BASE_DATASET" "$dataset" "yearly"
done
fi

# Retention cleanup (always runs)
for dataset in $DATASETS; do
target_dataset="$BASE_DATASET/$dataset"
delete_old_snapshots $target_dataset "daily" $DAILY_RETENTION
delete_old_snapshots $target_dataset "weekly" $WEEKLY_RETENTION
delete_old_snapshots $target_dataset "monthly" $MONTHLY_RETENTION
delete_old_snapshots $target_dataset "yearly" $YEARLY_RETENTION
done

send_notification "$(date '+%Y-%m-%d %H:%M:%S') $(hostname) - [INFO] - Snapshots created successfully!"

Defense Layer 2: System-Level Backups

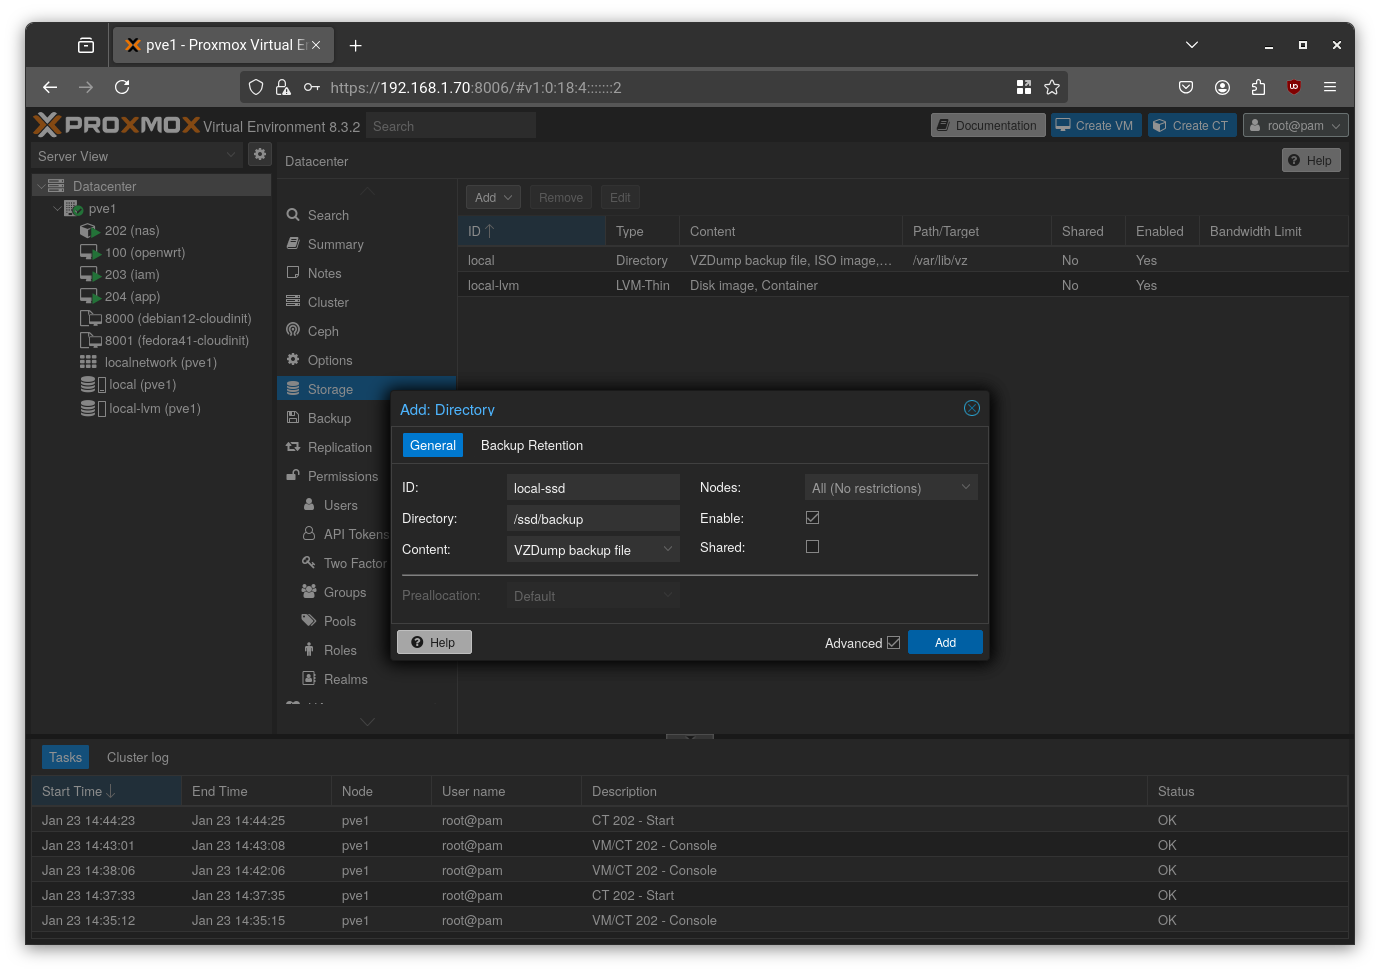
While snapshots protect the data within the datasets, we also need to protect the machines themselves. For this, I use the built-in Proxmox Backup feature.

I configured a backup job in the Proxmox web UI that runs every night. It creates a compressed backup of all my essential VMs and LXC containers (including the NAS container itself) and stores them on the ssd/backup ZFS dataset. If a VM ever becomes corrupted, I can restore it to a known good state in minutes.

The process here is straightforward. In the Proxmox web UI, go to Datacenter > Storage, click the Add button, select Directory, and configure it as needed. I configured it as shown in the figure below.

Proxmox vm backup

To further improve backup management, I decided to create a dedicated ZFS dataset to store a copy of the home folder from each machine. These home folders will include Docker Compose files for the installed services, along with their configuration files. To automate this process, I chose to use rsync.

Each new machine will run a cron job that backs up its entire home folder (including Docker Compose files and configuration data) to the NAS, under the path:
/ssd/docker/<machine_name>

  1. Install rsync

Install rsync on both the NAS and the machine whose data you want to sync:

1
2
sudo apt update
sudo apt install -y rsync
  1. Generate SSH Key on the Source Machine

On a machine running Docker (e.g., iam, app, etc.), generate an SSH key:

1
2
# Generate an SSH key (no passphrase)
sudo ssh-keygen -t ed25519

This will create a key pair in /root/.ssh/.

Copy the public key to the NAS by adding it to the ~/.ssh/authorized_keys file of the NAS:

1
ssh-ed25519 AAAAC3NzaC1lZDI1NTE5AAAAIIJWFqnXs/KhNnRzciiIUkja1Zklz5ru5O7DY1w9qFEu root@app
  1. Test rsync Sync

From the source machine (as root), run the following command to test the sync:

1
rsync -avz -e 'ssh -v' --delete /home/user root@10.0.20.2:/ssd/docker/app

Note the debug line that starts with:

1
debug1: Sending command: rsync --server -vlogDtprze.iLsfxCIvu --delete . /ssd/docker/app

We will use this exact command in the next step to restrict SSH access for security purposes.

  1. Harden SSH Access on the NAS

To restrict the allowed SSH command, open /root/.ssh/authorized_keys on the NAS and modify the corresponding line as follows:

1
command="rsync --server -vlogDtprze.iLsfxCIvu --delete . /ssd/docker/app",no-pty,no-agent-forwarding,no-X11-forwarding ssh-ed25519 AAAAC3NzaC1lZDI1NTE5AAAAIIJWFqnXs/KhNnRzciiIUkja1Zklz5ru5O7DY1w9qFEu user@app

This ensures the remote machine can only run the specified rsync command and nothing else via SSH.
See this guide for more details on securing rsync over SSH.

  1. Automate with a Cron Job

Finally, add the rsync command to the root user’s crontab on the source machine:

1
sudo crontab -e

And add the following line to run the backup every day at midnight:

1
0 0 * * * rsync -avz --delete /home/user root@10.0.20.2:/ssd/docker/app

Defense Layer 3: Offsite Disaster Recovery

This is the cornerstone of the 3-2-1 rule and protects against catastrophic events like fire, flood, or theft.

My offsite backup solution consists of a Raspberry Pi with a large external USB hard drive, located at my parents’ house approximately 400 km away. I installed Ubuntu and ZFS on the Pi and established a persistent WireGuard VPN tunnel for secure communication with my home network.

For enhanced security, the ZFS pool at the offsite location is encrypted using a passphrase that is never stored locally on the Raspberry Pi’s SD card. Instead, the encryption key is transmitted remotely and held in memory only during the backup process.

Initial Setup of the Raspberry Pi

The Raspberry Pi will serve as the offsite backup host. I’ll connect an external USB drive to it and format it using ZFS.

Step 1: Flash a Linux Distro

Use the official Raspberry Pi Imager (rpi-imager) to flash Ubuntu onto the SD card. During setup, you can:

  • Create a new user
  • Enable SSH and configure SSH keys
  • Set up Wi-Fi (if needed)

After flashing, insert the SD card into the Pi and power it on.

Step 2: Connect via SSH

Once the Pi has booted:

1
2
3
4
5
6
7
8
9
10
11
# Find the Pi’s IP address
sudo nmap -sn -n 192.168.1.0/24

# Connect to the Pi via SSH
ssh root@<raspi-ip>

# Update the system
sudo apt update && sudo apt dist-upgrade -y

# Install ZFS and WireGuard
sudo apt install -y zfsutils-linux wireguard
Step 3: Create WireGuard Keys

Generate a WireGuard key pair on both the NAS and the Raspberry Pi.

Then, on your OpenWRT router, configure a new WireGuard VPN tunnel. Harden it so that only the NAS can access the Raspberry Pi, which will automatically connect on boot. Allow access only to SSH (port 22).

Step 4: Configure WireGuard on the Raspberry Pi

On the Raspberry Pi, create the WireGuard configuration file:

1
sudo nano /etc/wireguard/wg0.conf

Paste the configuration from your OpenWRT router (adjust as needed). Then enable the VPN tunnel at boot:

1
2
3
sudo systemctl daemon-reload
sudo systemctl enable wg-quick@wg0
sudo systemctl start wg-quick@wg0

Setting Up the Encrypted ZFS Pool

⚠️ Important: ZFS encryption on the Raspberry Pi is independent from any encryption used on your Proxmox or NAS systems. It’s best to manually recreate the datasets before sending data with zfs send/receive.

Step 5: Format the External Drive with ZFS

Connect the external HDD to the Pi and format it:

1
2
3
4
5
6
7
8
# Identify the disk (e.g. /dev/sda)
lsblk

# Wipe all partitions
sudo sgdisk --zap-all /dev/sda

# Create a new GPT partition
sudo sgdisk -n1:0:0 -t1:BF00 /dev/sda

Now create the encrypted ZFS pool:

1
2
3
4
5
6
7
8
9
sudo zpool create \
-o ashift=12 \
-o autotrim=on \
-O encryption=on -O keyformat=passphrase -O keylocation=prompt \
-O acltype=posixacl -O xattr=sa -O dnodesize=auto \
-O compression=lz4 \
-O normalization=formD \
-O atime=off \
ssd /dev/sda
Step 6: Create ZFS Datasets

Create specific datasets for different backup purposes:

1
2
3
4
5
6
7
8
9
10
11
12
13
14
15
16
17
# Personal data (e.g., Nextcloud, Immich, Paperless)
zfs create ssd/archive

# Proxmox VM and container backups
zfs create ssd/backup

# Docker Compose files and config (rsynced)
zfs create ssd/docker

# Shared data via Samba
zfs create -o casesensitivity=insensitive ssd/share

# Syncthing data (Syncthing handles file versioning)
zfs create ssd/sync

# Data to be uploaded to cloud storage via rclone
zfs create ssd/cloud

SSH Key Authentication

Step 7: Set Up SSH Keys

On both the Proxmox host and NAS, generate SSH key pairs:

1
ssh-keygen -t ed25519

Then:

  • Copy the Proxmox host’s public key to the Raspberry Pi’s /root/.ssh/authorized_keys.

  • Copy the NAS public key to the Proxmox host’s /root/.ssh/authorized_keys.

Step 8: Enable Root SSH Access on the Raspberry Pi

Edit the SSH server configuration:

1
sudo nano /etc/ssh/sshd_config

Uncomment or add the following line:

1
PermitRootLogin prohibit-password

Then restart SSH:

1
sudo systemctl restart ssh

Off-site copy

The magic here is zfs send/receive. I wrote a third automation script on my Proxmox host that performs the offsite backup every night:

  1. Connects Securely: It establishes an SSH connection to the Raspberry Pi over the WireGuard VPN.

  2. Unlocks the Remote Vault: It securely sends the encryption key to unlock the remote ZFS pool.

  3. Identifies Changes: It compares the latest local snapshot on my NAS with the last snapshot successfully sent to the offsite location.

  4. Sends Incrementally: It uses zfs send -i to send only the data blocks that have changed since the last replication. This is incredibly efficient and minimizes bandwidth usage.

  5. Locks Down and Shuts Down: After the transfer is complete, the script instructs the remote Raspberry Pi to lock the ZFS pool (ejecting the key from memory) and then shut down completely to save power and reduce its attack surface.

  6. Reports Status: Finally, it sends a detailed report to my Telegram bot.

1
2
3
4
5
6
7
8
9
10
11
12
13
14
15
16
17
18
19
20
21
22
23
24
25
26
27
28
29
30
31
32
33
34
35
36
37
38
39
40
41
42
43
44
45
46
47
48
49
50
51
52
53
54
55
56
57
58
59
60
61
62
63
64
65
66
67
68
69
70
71
72
73
74
75
76
77
78
79
80
81
82
83
84
85
86
87
88
89
90
91
92
93
94
95
96
97
98
99
100
101
102
103
104
105
106
107
108
109
110
111
112
113
114
115
116
117
118
119
120
121
122
123
124
125
126
127
128
129
130
131
132
133
134
135
136
137
138
139
140
141
142
143
144
145
146
147
148
149
150
151
152
153
154
155
156
157
158
159
160
161
#!/bin/bash

# Parameters
LOCAL_POOL="ssd" # Local pool name
REMOTE_USER="root" # Remote user name
REMOTE_HOST="10.0.120.2" # Remote machine address
SNAPSHOT_FILE="/opt/backup/log/last_snapshot.txt" # File to store the last sent snapshot
KEYFILE="/opt/backup/secret/passphrase"

# List of datasets to sync
DATASETS=("ssd/archive" "ssd/backup" "ssd/cloud" "ssd/docker" "ssd/share" "ssd/sync")

# Telegram data for notifications
TELEGRAM_TOKEN=<TELEGRAM_TOKEN>
TELEGRAM_CHAT_ID=<TELEGRAM_CHAT_ID>

# Function to send a telegram alert on error
send_notification() {
local message="$1"
local url="https://api.telegram.org/bot$TELEGRAM_TOKEN/sendmessage?chat_id=$TELEGRAM_CHAT_ID"
curl -G --data-urlencode "text=$message" "$url"
}

# Function to send an telegram alert on error
send_notification_file() {
local message="$1"
local url="https://api.telegram.org/bot$TELEGRAM_TOKEN/sendDocument"

# Get the URL-encoded caption
local caption
caption=$(echo "$message" | curl -G -s --data-urlencode "text=$message" "")

# Send the file with the caption
curl -X POST "$url" \
-F "chat_id=$TELEGRAM_CHAT_ID" \
-F "document=@/opt/backup/log/zfs-offsite-auto.log" \
-F "caption=$caption"
}


# Function to get the latest snapshot available for a dataset
get_last_snapshot() {
local dataset="$1"
# List the snapshots of the dataset, ordered by creation date
local=$(zfs list -t snapshot -o name -s creation "$dataset" 2>/dev/null | tail -n 1)
echo $local
}

# Function to send a snapshot
send_snapshot() {
local dataset="$1"
local snapshot="$2"
local last_snapshot_remote="$3"
echo "$(date '+%Y-%m-%d %H:%M:%S') $(hostname) - [INFO] - Sending snapshot $snapshot for dataset $dataset..."
# Use zfs send to send the full or incremental snapshot
if [ -z "$last_snapshot_remote" ]; then
# Full snapshot
zfs send "$snapshot" | ssh "$REMOTE_USER@$REMOTE_HOST" "zfs receive -F $dataset"
if [ $? -ne 0 ]; then
echo "$(date '+%Y-%m-%d %H:%M:%S') $(hostname) - [ERROR] - Error in transferring the snapshot $snapshot to the remote disk."
send_notification "$(date '+%Y-%m-%d %H:%M:%S') $(hostname) - [ERROR] - Error in transferring the snapshot $snapshot to the remote disk."
exit 1
fi
else
# Incremental snapshot
zfs send -i "$last_snapshot_remote" "$snapshot" | ssh "$REMOTE_USER@$REMOTE_HOST" "zfs receive -F $dataset"
if [ $? -ne 0 ]; then
echo "$(date '+%Y-%m-%d %H:%M:%S') $(hostname) - [ERROR] - Error in transferring the snapshot $snapshot to the remote disk."
send_notification "$(date '+%Y-%m-%d %H:%M:%S') $(hostname) - [ERROR] - Error in transferring the snapshot $snapshot to the remote disk."
exit 1
fi
fi
}

# Function to get the last snapshot sent remotely for a specific dataset
get_last_snapshot_remote() {
local dataset="$1"
local last_snapshot_remote=""
if [ -f "$SNAPSHOT_FILE" ]; then
last_snapshot_remote=$(grep "$dataset" "$SNAPSHOT_FILE" | awk '{print $2}')
fi
echo $last_snapshot_remote
}

# Function to update the snapshot file with the latest snapshot sent
update_snapshot_file() {
local dataset="$1"
local last_snapshot_local="$2"
# Remove the existing line for the dataset and add the new one
[ ! -e $SNAPSHOT_FILE ] && touch $SNAPSHOT_FILE
sed -i "/^$(echo "$dataset" | sed 's/[&/\]/\\&/g')/d" "$SNAPSHOT_FILE"
echo "$dataset $last_snapshot_local" >> "$SNAPSHOT_FILE"
}

# Process each dataset
for dataset in "${DATASETS[@]}"; do
echo "Processing dataset $dataset..."

cat $KEYFILE | ssh -o ConnectTimeout=10 $REMOTE_USER@$REMOTE_HOST 'zfs load-key -a && exit 1'

STATUS=$?

# Check if the SSH connection was successful
if [ $STATUS -ne 1 ]; then
if [ $STATUS -eq 255 ]; then
echo "$(date '+%Y-%m-%d %H:%M:%S') $(hostname) - [ERROR] - The target machine is not reachable or SSH failed with error $STATUS."
send_notification "$(date '+%Y-%m-%d %H:%M:%S') $(hostname) - [ERROR] - Cannot connect to the remote machine, offsite backup failed!"
exit 1
else
echo "$(date '+%Y-%m-%d %H:%M:%S') $(hostname) - [ERROR] - Failed decrypting remote disk with error $STATUS."
send_notification "$(date '+%Y-%m-%d %H:%M:%S') $(hostname) - [ERROR] - Failed decrypting raspi disk with error $STATUS."
exit 1
fi
fi

# Get the latest local snapshot for the dataset
last_snapshot_local=$(get_last_snapshot "$dataset")

echo "$(date '+%Y-%m-%d %H:%M:%S') $(hostname) - [INFO] - Last snapshot local is $last_snapshot_local"

# Get the last snapshot sent to the remote machine for the dataset
last_snapshot_remote=$(get_last_snapshot_remote "$dataset")

echo "$(date '+%Y-%m-%d %H:%M:%S') $(hostname) - [INFO] - Last snapshot remote is $last_snapshot_remote"

if [ -z "$last_snapshot_local" ]; then
echo "$(date '+%Y-%m-%d %H:%M:%S') $(hostname) - [INFO] - No local snapshots found on disk."
continue
fi

if [ "$last_snapshot_remote" == "$last_snapshot_local" ]; then
echo "$(date '+%Y-%m-%d %H:%M:%S') $(hostname) - [INFO] - The last snapshot for dataset $dataset is already present on the remote machine."
continue
fi

# Check if the remote snapshot still exists locally
if [ -z $(zfs list -o name "$last_snapshot_remote" 2>/dev/null | tail -n 1) ] ; then
# Send a full snapshot
echo "$(date '+%Y-%m-%d %H:%M:%S') $(hostname) - [INFO] - The remote snapshot $last_snapshot_remote no longer exists locally for dataset $dataset. Sending a full snapshot."
send_snapshot "$dataset" "$last_snapshot_local"
else
# Send the incremental snapshot
echo "$(date '+%Y-%m-%d %H:%M:%S') $(hostname) - [INFO] - Sending incremental snapshot from $last_snapshot_remote to $last_snapshot_local for dataset $dataset"
send_snapshot "$dataset" "$last_snapshot_local" "$last_snapshot_remote"
fi

# Update the snapshot file with the latest snapshot sent for the dataset
update_snapshot_file "$dataset" "$last_snapshot_local"
echo "$(date '+%Y-%m-%d %H:%M:%S') $(hostname) - [INFO] - Snapshot $last_snapshot_local for dataset $dataset sent successfully."
done

ssh $REMOTE_USER@$REMOTE_HOST 'zfs umount -a && zfs unload-key -a'
ssh $REMOTE_USER@$REMOTE_HOST '/sbin/shutdown -h now'
if [ $? -ne 0 ]; then
echo "$(date '+%Y-%m-%d %H:%M:%S') $(hostname) - [ERROR] - Failed to unload remote key."
send_notification "$(date '+%Y-%m-%d %H:%M:%S') $(hostname) - [ERROR] - Failed to unload remote key."
exit 1
fi

send_notification "$(date '+%Y-%m-%d %H:%M:%S') $(hostname) - [INFO] - Offsite backup completed successfully!"
send_notification_file "Attached log file."

This setup ensures that I always have a recent, full, and encrypted copy of my critical data in a completely different geographical location.

Conclusion: A Fully-Armored Homelab

Our infrastructure is now complete and, more importantly, fully secured. We have a hypervisor for our machines, a segmented network for secure communication, a resilient vault for our data, and a multi-layered, automated system to protect it all. The foundation is rock-solid.

With the confidence that our data is safe, we can finally move on to the most exciting part of this journey: deploying the user-facing applications we need.

In the next post, we’ll begin this new phase by installing and configuring FreeIPA and Authentik: two components that will simplify identity management within our environment.

Stay tuned! 🚀