Selecting the hardware for your self-hosted environment is one of the most critical decisions you’ll make. It’s not just about picking components, it’s about creating a setup that aligns with your goals, fits your constraints, and inspires confidence in your system’s reliability. In this post, I’ll walk you through my thought process and share how I made my decision.

How do I choose the Hardware?
Setting the Stage: Goals and Constraints
Before exploring options, it’s crucial to remember there is no “one-size-fits-all” solution. The best choice depends entirely on your specific context. Here’s a recap of mine:
My Goals
- 24/7 Availability: Services must be reliable and always on.
- Secure Network: A properly structured LAN with VLANs, like an enterprise setup.
- Privacy and Data Ownership: Transition from cloud services like Google Drive to self-hosted storage solutions.
- Entertainment and Productivity: Host services for media streaming, meal planning, trip organization, expense tracking, and automation tasks.
- Future Scalability: Leave room to explore home automation down the line.
My Constraints
- Budget: Maintain reasonable costs for both hardware and operational expenses.
- Space & Noise: I live in a small apartment, so my setup needs to be small and quiet.
My Starting Point: Existing Hardware
In the past, I already bought these devices that I will include in my self-hosting environment:
Raspberry Pi 4 Model B (Pi4B)
- CPU: ARM v8, SoC quad-core Cortex-A72 64bit running at 1,5GHz, Broadcom BCM2711
- RAM: 2GB LPDDR4
- Storage: 32GB SD card
- Network: 1x Gigabit Ethernet port + 802.11 b/g/n/ac Wireless LAN + Bluetooth 5.0 with BLE
- Others: 2x micro-HDMI ports + 2x USB2 ports + 2x USB3 ports + 1x Raspberry Pi camera port + 1x Raspberry Pi display port + 1x GPIO
HP EliteDesk 705 G5 Mini
- CPU: AMD Ryzen 5 Pro 3400G (4 cores, 8 threads, 3.7GHz up to 4.2GHz turbo, TDP 65W)
- GPU: AMD Radeon Vega 11
- RAM: 64GB Corsair Vengeance SODIMM DDR4 (2x32GB) 2666MHz
- Storage: 2TB SSD SATA III 2.5”
- Network: 1x Gigabit Ethernet port
These two devices could potentially be enough for my infrastructure, but they don’t fully meet all my requirements.
The Raspberry Pi is optimal for its low power consumption, but it lacks the processing power needed for hosting my environment.
The EliteDesk, while excellent in terms of performance, has insufficient storage space and isn’t ideal for a 24/7 environment due to its power consumption.
So, I decided to buy a new device that addresses the shortcomings of these two and provides a perfect foundation for my environment.
A New Server: My Wishlist
Based on my goals, I created a wishlist for the new core of my setup:
- Generous RAM: I don’t need to host CPU-intensive applications, and I have only two users to serve, so I don’t have high requirements for the CPU. However, I plan to host many applications, so a good amount of RAM is necessary.
- Ample Storage: Archiving all multimedia and documents requires plenty of space.
- Disk Redundancy: Data safety and reliability are non-negotiable; redundancy through RAID is a must.
- Compact Size: Must fit discreetly in a small apartment.
- Quiet Operation: No one wants a noisy setup in their home, no jet engines allowed.
- Low Power Consumption: Crucial for a 24/7 server that won’t inflate my electricity bill.
- Affordability: Performance matters, but it must stay within budget.
With these criteria in mind, I evaluated three potential solutions.
Option 1: ASRock N100DC-ITX Mini-ITX Board
The first option I evaluated was building a system based on a mini-ITX motherboard. This involved purchasing a motherboard with an integrated CPU, RAM, a power supply, and a case compatible with redundant storage.
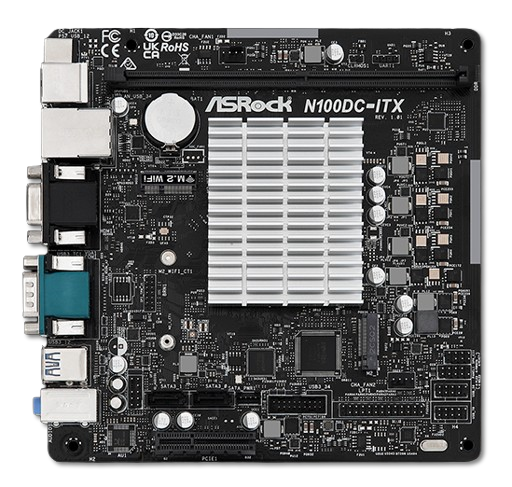
ASRock N100DC-ITX
Here’s an overview of the components and their costs for this solution:
- ASRock N100DC-ITX: €135
- SO-DIMM DDR5 32GB RAM: €74.99
- NAS Case (Jonsbo N2): €140 – A compact and stylish case that accommodates HDDs and fits the board perfectly.
- Corsair SF450 Power Supply: €100
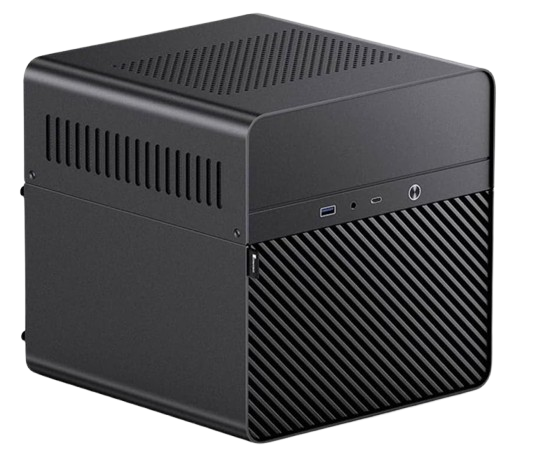
NAS Case Jonsbo N2
For powering the system, I chose to use an ATX power supply instead of a traditional picoPSU because the ASRock N100DC-ITX can support only two 3.5-inch HDDs, due to its 4-pin JST SATA power connector. The board’s SATA power interface is rated for 2A, but a typical 7200 RPM 3.5-inch HDD can draw up to 2.5A during spin-up. This occurs when the drives are awakened from sleep, which could potentially strain the power supply. Although this is not a frequent event, it presents a risk for a system intended for continuous 24/7 operation.
To create a scalable system that could handle more than two 3.5-inch HDDs, I found the following solution:
- Buy a modular ATX power supply, such as the Corsair SF450, which offers reliable power delivery.
- Build a custom cable using a 4-pin JST cable and a DC jack-to-terminal adapter to connect the PSU to the board.
- Manually jump the ATX connector with a wire to turn on the power supply without relying on the motherboard’s signal.
Here’s an overview of the final specifics for this solution:
- Processor: Intel N100 (12th Gen, 4 cores, 6W TDP)
- RAM: Supports up to 32GB SO-DIMM DDR4
- Storage: 2x SATA III ports with PCIe Gen 3 expansion
- Networking: 1x Gbit Ethernet (GbE) LAN port and 1x PCIe M.2 E-Key slot for a Wi-Fi adapter
- Price: ~€450 (fully built with case and PSU)
While this option is very interesting because it offers modern technology and expandability, it requires complex power modifications to support additional HDDs and it is also expensive.
Option 2: ZimaBlade 7700 NAS Kit
The second option I evaluated was a ready-to-use solution based on an excellent x86 board called ZimaBlade, with the following specifications:
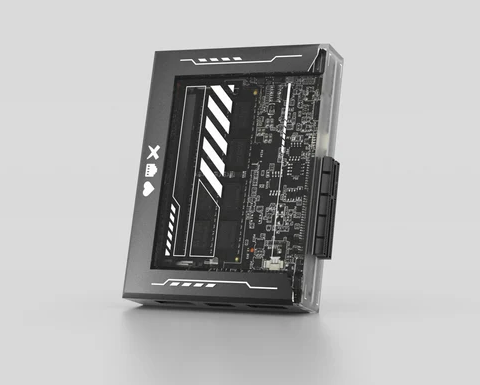
Zimablade 7700
- Processor: Intel Celeron N3450 (4 cores, 6W TDP).
- RAM: Supports up to 16GB DDR3L.
- Storage: 2x SATA III ports with PCIe 2.0 expansion which allows for the addition of up to 4 additional SATA ports.
- Networking: 1x Gbit Ethernet (GbE) LAN port.
- Price: ~€187 (with taxes).
The price of this solution refers to the NAS kit bundle, which includes 16GB of RAM and a bay rack for up to two 3.5-inch HDDs.
While this solution is the only one ready out-of-the-box, and is both affordable and compact, its older processor and limited scalability do not align with my future needs. Additionally, expanding beyond two HDDs could strain the power adapter, requiring additional power management solutions.
Option 3: Mini-PC Based on x86 P5 Board
This third option is a compact and versatile mini-PC based on the x86 P5 board by CWWK. This is an overview of the specification:
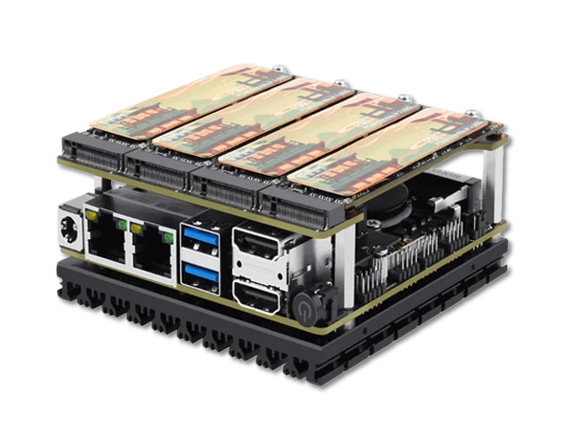
CWWK x86 P5 Development Board
- Processor: Intel N100 (12th Gen, 4 cores, 6W TDP).
- RAM: 1x slot supports up to 48GB SO-DIMM DDR5 4800MHz.
- Storage: 1x PCIe 3x4 lane which supports 4x NVMe Gen 3 slots.
- Networking: 2x 2.5Gbit Ethernet (GbE) LAN ports and 1x PCIe M.2 E-Key slot for a Wi-Fi adapter.
- Price: ~€233 (€158.70 for barebone configuration + €74.99 for 32GB RAM).
This option offers the perfect balance of performance, power efficiency, and expandability. Its compact size (10x10x5.85 cm) and low power consumption make it ideal for my space.
Choosing Storage: HDD, SATA SSD, or NVMe SSD?
With the base system chosen, the next question was what to put inside it. Here a comparison of the most popular options.
| Type | Pros | Cons | Best Use Case |
|---|---|---|---|
| HDD | High capacity, lower cost per TB | Noisy, high power consumption, slow speed | Large, static data (backups) |
| SATA SSD | Faster, silent | Limited capacity, higher cost per TB | Balanced performance/capacity |
| NVMe SSD | Compact, silent, highest speed | Limited capacity, higher cost per TB | High-speed apps and NAS setups |
HDD vs SSD SATA vs SSD NVME
Here’s a quick comparison of the products I found and their approximate prices at the time I searched:
| Model | RPM | Transfer Rate (MB/s) | Workloads (TB/Year) | Price (€) |
|---|---|---|---|---|
| WD Red Plus 2TB | 5400 | 180 | 180 | 98.00 |
| WD Red Plus 4TB | 5400 | 185 | 180 | 130.00 |
| Seagate IronWolf 2TB | 5900 | 180 | 180 | 90.00 |
| Seagate IronWolf 4TB | 5900 | 180 | 180 | 124.00 |
| Seagate IronWolf Pro 2TB | 7200 | 195 | 300 | 116.00 |
| Seagate IronWolf Pro 4TB | 7200 | 214 | 300 | 140.00 |
| Toshiba N300 4TB | 7200 | 204 | 180 | 130.00 |
HDD 3.5-inch SATA III Comparison
| Model | Seq Write Speed (MB/s) | Seq Read Speed (MB/s) | TBW (TB) | Price (€) |
|---|---|---|---|---|
| WD Red SATA SA500 1TB | 530 | 560 | 600 | 59.17 |
| WD Red SATA SA500 2TB | 530 | 560 | 1,300 | 110.79 |
| Samsung 870 EVO 1TB | 530 | 560 | 600 | 95.88 |
| Samsung 870 EVO 2TB | 530 | 560 | 1,200 | 164.85 |
| Crucial MX500 1TB | 560 | 560 | 700 | 88.95 |
SSD SATA III Comparison
| Model | Seq Write Speed (MB/s) | Seq Read Speed (MB/s) | TBW (TB) | Price (€) |
|---|---|---|---|---|
| WD_BLACK SN850 1TB | 5300 | 7000 | 600 | 148.99 |
| Samsung 970 EVO Plus 1TB | 3500 | 3500 | 600 | 123.39 |
| Crucial P5 1TB | 3400 | 3400 | 600 | 92.99 |
SSD NVMe M.2 Comparison
The TBW (Terabytes Written) metric is a critical factor in assessing the durability of SSDs. It indicates the maximum amount of data a drive can write over its lifetime, as declared by the vendor.
For a silent, compact, and high-performance system, NVMe SSDs were the clear winner.
The Final Decision & Assembly
I settled on the Mini-PC x86 P5 with NVMe SSDs. This setup ticked all my boxes and stayed within budget.
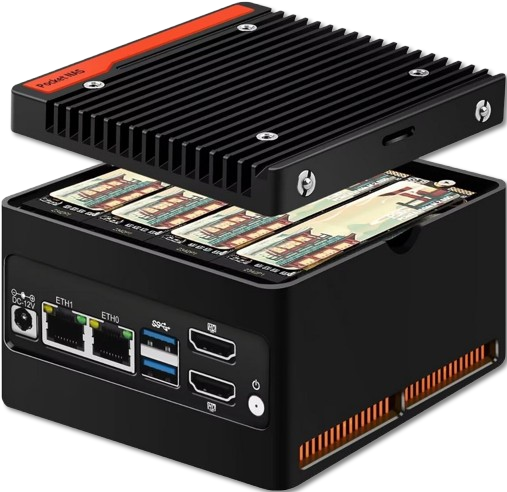
Mini-PC x86 P5
- Mini-PC (barebone): €158.70
- 32GB DDR5 RAM: €74.99
- 3x 2TB NVMe SSDs: €207
- Total Cost: €440
A quick note on performance: the four NVMe slots on this board share a single PCIe 3.0 x4 interface. Think of it like a four-lane highway. While the total speed limit is high (4 GB/s), that bandwidth is shared if all drives are active simultaneously. For my use case, this is a perfectly acceptable trade-off for the compactness and price.
With the components in hand, it was time to build! The assembly was straightforward, as you can see in this short clip I made:
Assembling the Pieces
What’s Next?
The hardware is chosen, and the heart of my homelab is assembled. But a powerful server is just a box without a plan. Now that we know the physical constraints, we can design the software architecture that will run on it.
In the next post, we’ll shift from the physical to the logical, laying out the blueprint for my virtualized infrastructure.
Stay tuned! 🚀